")
")
Controling the LEDs and the push button on the front panel of Broachlink Noah series motherboards under Linux
Introduction
Since the Noah series Broachlink motherboards are intended to be the perfect replacement for the APU series PC Engines motherboards, it was necessary to have the same kind of driver under Linux, to perform the software transitions between the APU platform and Noah. What made the success of the PC Engines motherboards is the fact that there are Linux drivers to control the LEDs and the front panel button.
Driving LEDs and a push button at the hardware level is not an easy thing for most high-level application developers. On the other hand, opening a file to write in it and turning on or off an LED is accessible to everyone and even system administrators via the shell or scripts. This is what was done for APUs.
Having found that this lack was penalizing for our Noah motherboard customers, we decided to program this driver. This Linux driver allows developers using Noah motherboards to access the same level of ease of driving the LEDs and the front panel button as on a PC Engines APU.
The Linux driver
This Linux driver is open source and is available on the Rack Matrix github repository. You will need to follow the instructions to compile the driver and install it.
Description of components
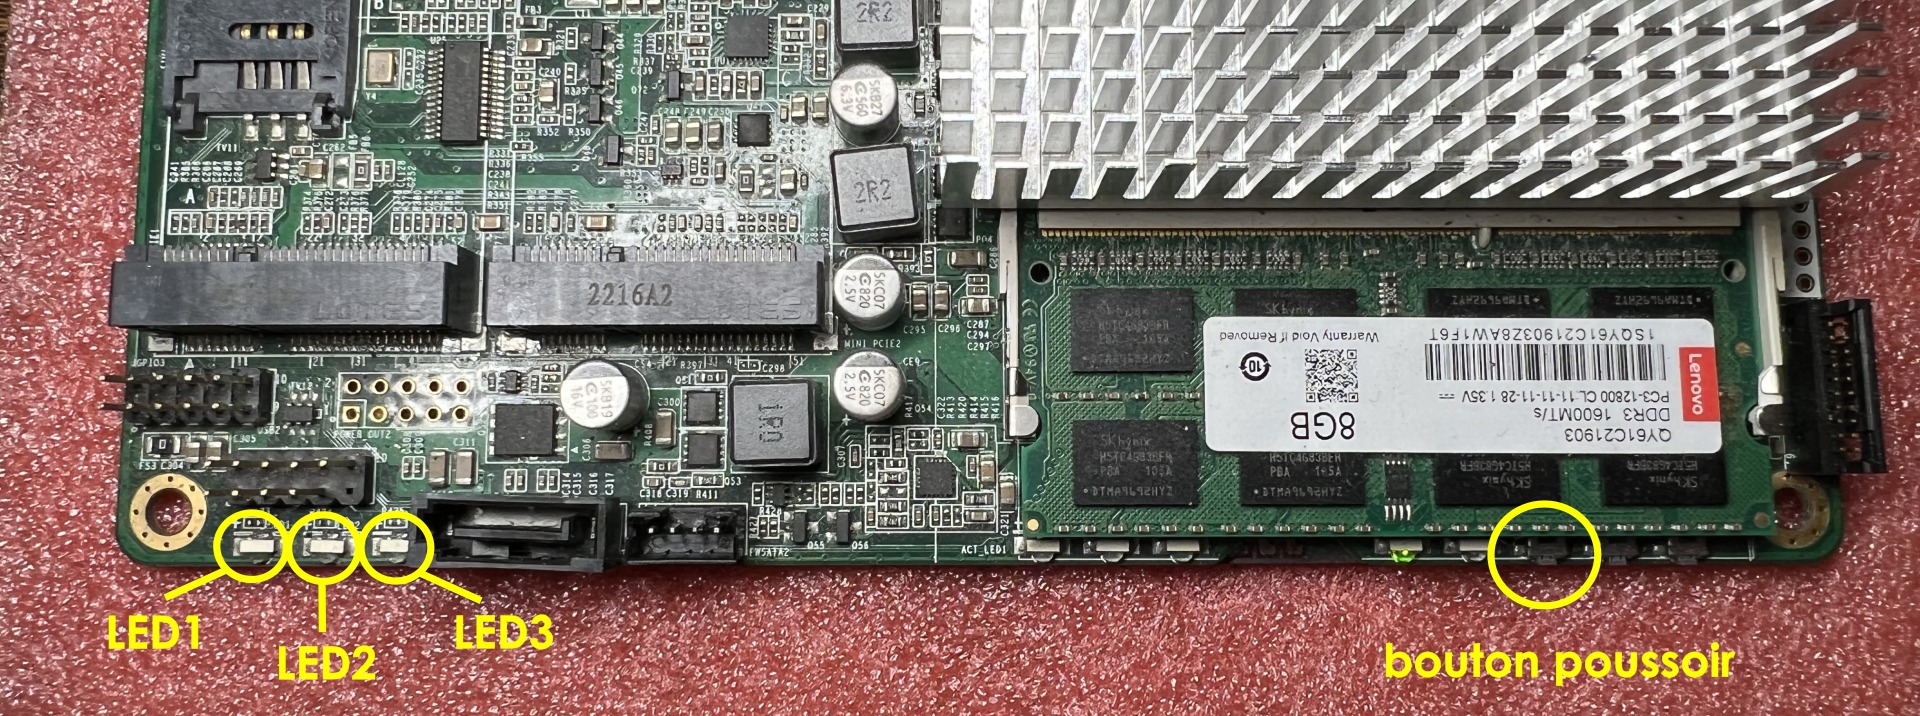
The photo above shows the location of the elements supported by the driver.
The driver allows you to manage the 3 LEDs located on the left of the motherboard and the first push button on the right of the motherboard.
to know if the driver is loaded correctly, look for the following message with dmesg if the driver is installed permanently, otherwise it will be displayed when loading the driver with the command insmod bl_noah.ko .
![]()
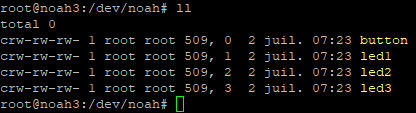
Once the driver is loaded and the correct motherboard is detected, all the peripherals (LEDs and buttons) are located in /dev/noah

Driving the elements
Driving the LEDs
To turn on/off the LEDs, you need to write the correct value into the desired LED file:
- ON : write ON or 1 in /dev/noah/ledX
- OFF : write OFF or 0 in /dev/noah/ledX
Remark: replace the X by the number of the desired LED.
Use from the shell
echo 1 > /dev/noah/led3
echo OFF > /dev/noah/led2Usage from an application source code
To turn on LED3, open the file /dev/noah/led3 and write 1 or ON in it then close the file
Reading the status of the LEDs.
The driver lets you know if the LEDs are on or off by reading their file in /dev/ledX
0: The LED is OFF1: The LED is ON
Status of an LED from the shell
cat /dev/noah/led3Status of an LED from the source code of an application
Open the file /dev/noah/ledX and read 1 Byte
Reading the push button status
To get information about the push button, you need to read its value from the file /dev/noah/button :
0for unpushed1for pushed
Read from the shell
To read the button state from the shell, you can use the following command:
cat /dev/noah/buttonReading from an application
To read the button state from an application, you will need to:
- Open the file /dev/noah/button
- Read 1 Byte from this file
- Close the file or do another reading